Corrosion mapping and composite inspection often imply covering very large areas. Automated scanners are a great solution for inspecting large areas, particularly with difficult access for inspectors. When accessibility is not an issue, a quick manual inspection may be sufficient. We present a freehand solution integrated with Capture™ software on both the M2M Gekko™ and M2M Mantis™ instruments.
Manual corrosion mapping and composite inspections are usually performed by moving a probe (conventional or phased array) along the surface of a sample with a 2-axis encoded scanner. The result of the inspection is typically a C-scan image that gives an intuitive map of the structures inspected. As the scanner is encoded along two directions, the displacement of the probe is typically a raster or a comb. This requires operators to increment the position of the probe carefully along the index axis to avoid missing data.
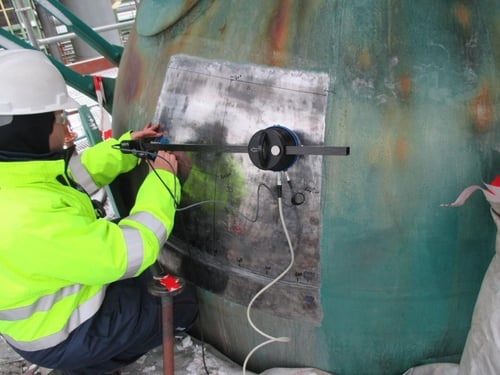
Both the Gekko and Mantis are equipped with three encoder inputs. This allows them to use 3-axis rotating arm scanners for freehand paintbrush inspections. These scanners are composed of a central pod that can be fixed to structures by magnets or suction cups, ensuring a fixed referential and no loss of data due to slippage. The pod contains the first encoded axis allowing rotation of the composite bar. The latter is the second encoded axis; it allows the translation of the probe. Finally, the third axis is the probe holder allowing another rotation. The combination of the three axis allows freehand displacement along the surface of the component. The scanner is designed for flat and slightly curved surfaces (~400mm/15.7in) and is only 2.1kg/4.6lb.
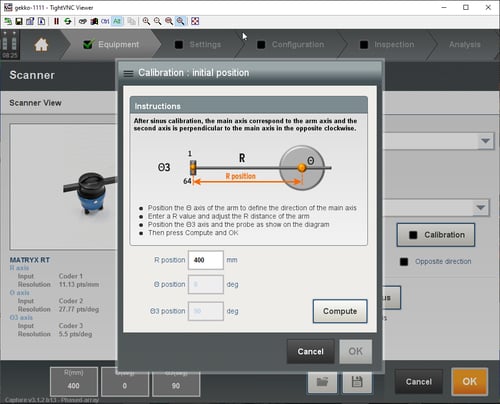
Capture offers the tools to calibrate the resolution of the three axes as well as transform the 3-axis freehand motion into a cartesian grid. Before inspection, operators just need to fix the central pod to the part, position the probe at a fixed distance (pictured here at 400mm/15.7in in the following image), press Compute, and the scanner is calibrated and ready to go.
The following video shows the inspection of a composite part using a phased array probe and a linear scan with a L0 wedge. The video starts with the probe at the position for calibration; the operator simply presses Calibrate and proceeds with the inspection. The software fills the C-scan taking into account the position and orientation of the probe. The operator just needs to fill the gap to ensure 100% coverage.
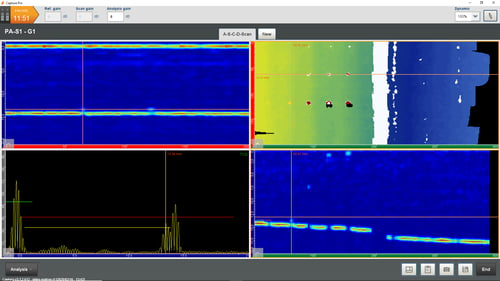
The result is similar to any composite or corrosion inspection with access to all the typical views (A-, B-, C-, D-scan, etc.). The following image shows these views for the composite part inspected in the previous video. Some flat-bottomed holes (FBH) are visible in the various views.
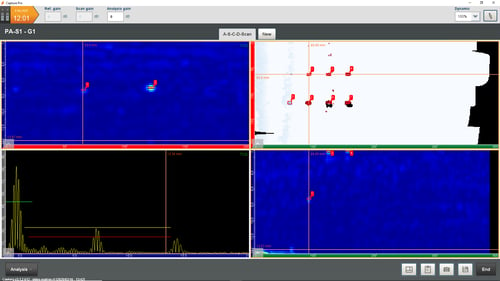
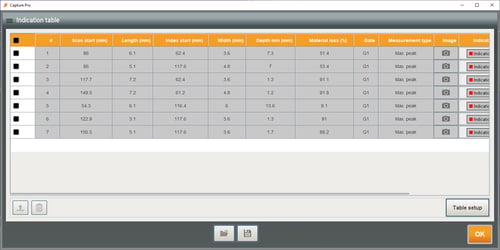
The files generated by this scanner are fully compatible with the auto-sizing feature available with version 3.1 of Capture. We use this feature to estimate the size of the FBH. We adjust the gates to remove the front and backwall echoes and then use the auto-sizing tool with a -6dB drop. The following images show the results of the auto-sizing analysis; seven indications are reported in the table of indications with their positions, dimensions, and depths.
The 3-axis scanners are compatible with both Phased Array Ultrasonic Testing (PAUT) and Total Focusing Method (TFM) techniques. As there is no file size limitation with Capture, large areas can be inspected with this solution.
If you’re in the market for a new PAUT solution, you must ask yourself these top 7 questions. We invite you to subscribe to our blog for weekly NDT news delivered right to your inbox and check out our Content on Demand on your own schedule. Our experts are happy to answer your questions about the M2M Gekko® and Mantis™ for your corrosion mapping and composite inspections; get in touch today and stay Beyond Current.


