Let’s go back to the basics. TFM is an ultrasonic testing method that uses PAUT probes to focus energy at every point of a region of interest, or ROI. Instead of performing a linear or sectorial scan, TFM defines an ROI where the operator is inspecting which provides optimal spatial resolution everywhere and therefore improved sensitivity. Learn more about the technique here.
As pioneers in the field of TFM, Eddyfi Technologies (M2M) were the first to offer this technology in a portable system.
The Gekko® is a field proven flaw detector that offers PAUT and TFM (as well as conventional UT and Time-Of-Flight-Diffraction, or TOFD) in a compact and portable package for in-service inspection. The embedded software flattens the learning curve for any level inspector who also benefits from high-resolution and speed when performing weld inspection and corrosion mapping. When you consider the various heavy machinery involved with mining operations, there’s a range of critical components that require regular integrity assessments.
For example, TKY joints are the result of joining two pieces of metal together either perpendicular or on an angle, and they can be found across mining assets everywhere. The Gekko’s embedded software, Capture™, features an application that allows operators to define this type of geometry and positioning of ultrasonic echoes in the geometry for better interpretation of the visual results. See the results for yourself and learn more about TKY weld inspection here.
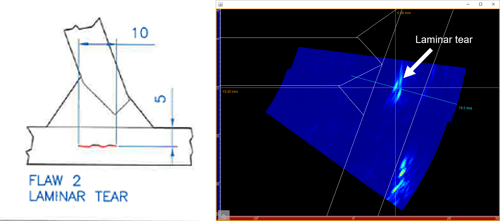
Here we see a laminar tear detected by high angles.
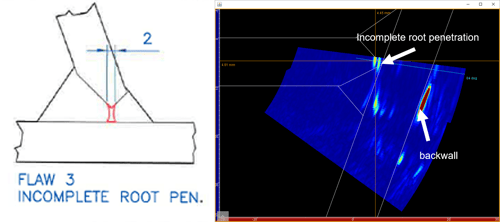
And here we can see the incomplete root detected for angles.
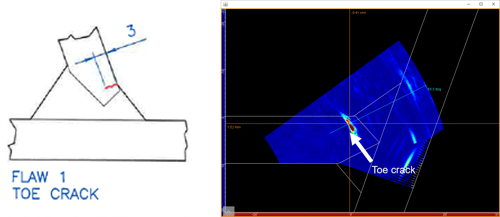
Finally, the toe crack is detected after a rebound off the opposite surface of the tee.
It’s not uncommon to find complex components that make up essential mining equipment. From an ultrasonic standpoint, the difficulty for inspection comes with trying to define a proper scan plan and interpret the various ultrasonic echoes. Fortunately, all of our PAUT systems have the ability to import 2D CAD files to assist operators to properly define their scan plan. This allows focusing on the right locations for maximum sensitivity. A CAD file also allows superimposing UT data on the test piece to take the guesswork out of interpretation and flaw sizing. Take a closer look at how Capture software makes complex component inspection uncomplicated here.
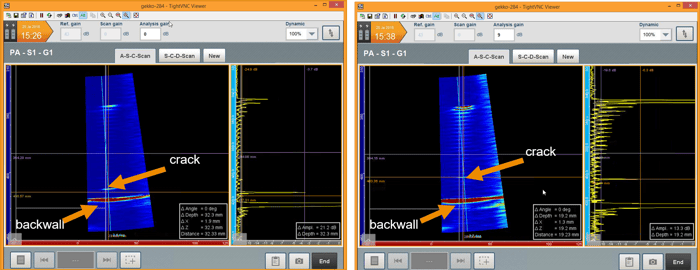
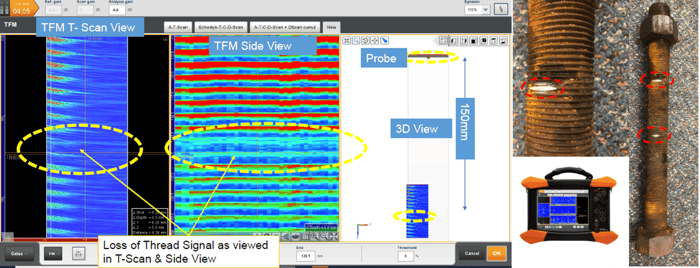
In this example, we take a look at the inspection of long bolts. We can see small cracking at 1mm high and 10-20mm long located in the threads with detection at a great Signal-to-Noise Ratio (SNR) of more than 20 dB.
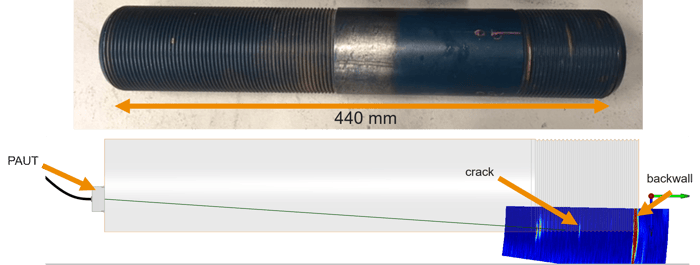
This minute cracking is one of the most hazardous types of metal fatigue that may otherwise go unnoticed and slowly deteriorate the mining component over time. With TFM, we can detect thread wear before it’s too late.
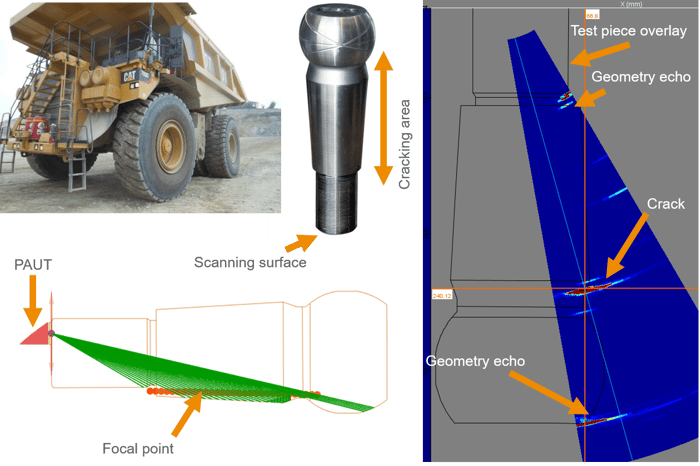
The ball studs connecting steering linkages found in industrial trucks present challenges around accessibility for inspection from the threaded side with conventional techniques but PAUT offers the solution by sweeping the beam along the tapered surface to look for cracks. By using a PAUT probe positioned on one side and a set of delay laws focused along the opposite wall to maximize sensitivity, inspectors can discriminate indication from geometry echoes thanks to a superimposed overlay with the sectorial scan.
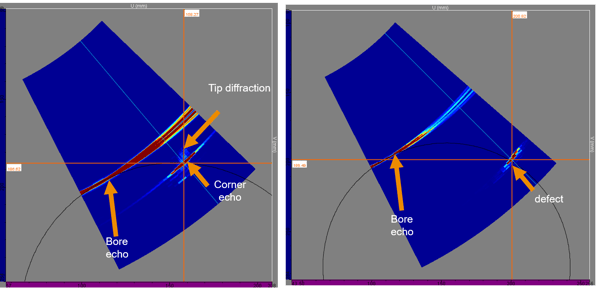
A PAUT probe is also a great solution for bore and lug inspection as it allows better coverage even with limited access using multiple scanning angles and better detection and characterization of cracks. Cracks are an inevitable result from the inner bore under high stress. It’s actually preferred to inspect these components with the pin or shaft in place to allow continued operation of the mining equipment. These components are typically thick with cracks propagating in random directions. With a large aperture, the spatial resolution and thus sensitivity for detection of smaller detects is improved. This allows preventative action to be taken with the more accurate sizing information.
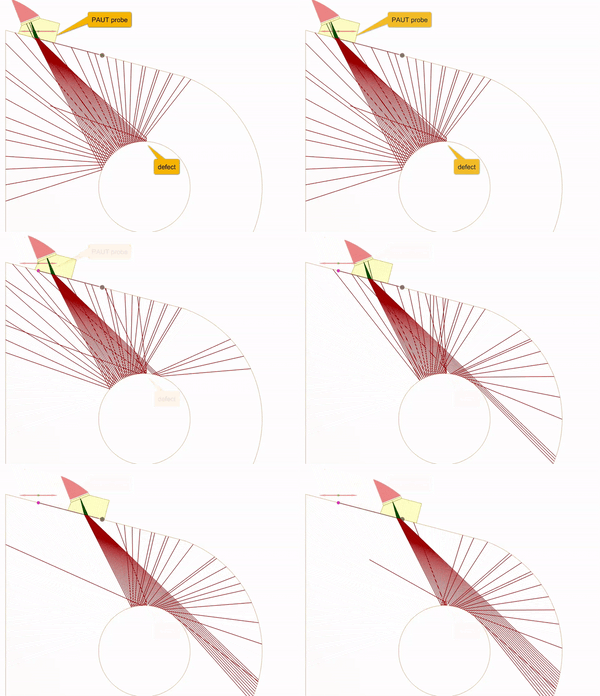
As shown, one position of the PAUT probe can detect several defect locations along the inner bore.
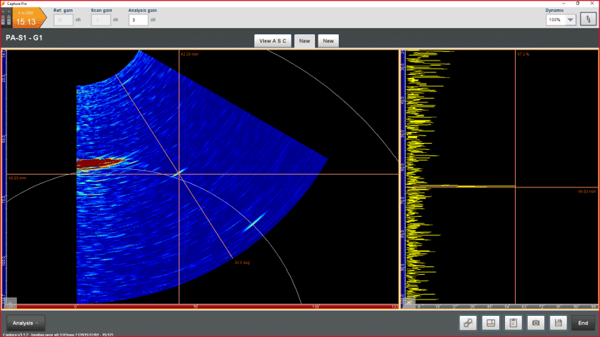
Just like you want to keep the pin or shaft in place for bore and lug inspection, shafts and axle inspection has the same benefit. To avoid dismantling and decreasing production, inspection from the shaft end is required which means long ultrasonic paths when you consider these big, heavy, thick components. Large aperture probes can focus energy further improving spatial resolution and ability to find small flaws early. Defects as far as 1,200mm are detected with an SNR greater than 20 dB. Again, CAD overlays of axles superimposed on the UT data facilitates better interpretation and Probability of Detection (PoD).
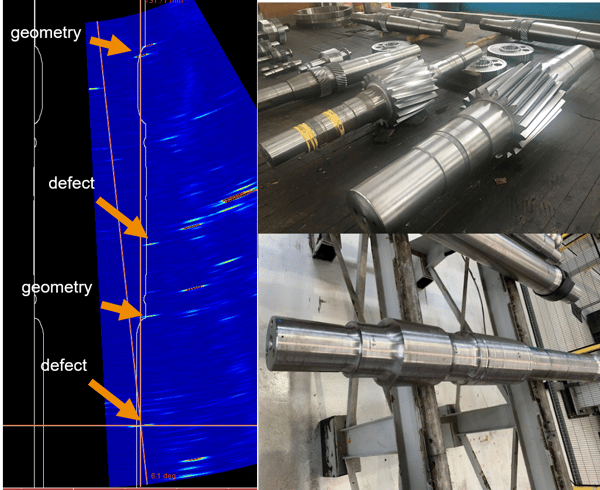
A final example of the benefits of PAUT for mining equipment inspection highlights gear teeth. It can complement eddy current array inspections by searching for and measuring any internal and sub-surface defects found. The same logic applies here where large probes can detect and size indications at an early stage, and CAD files can correctly position the indications in the gear teeth.

It’s hard to imagine massive mining machinery failing from any of these smaller components, but we know all too well this is exactly what can happen without proper condition monitoring. Remove the element of surprise with increased productivity and reduced risk thanks to proactive data results offered by the Gekko for inspecting the heavy-duty trucks, loaders, diggers, earth movers, crushers, and processing equipment you depend on for everyday operations. Contact one of our NDT experts to discuss your mining inspection application today and stay Beyond Current.


