The use of magnetic flux leakage (MFL) for the rapid detection of corrosion is well known within the non-destructive industry. Predominantly adopted within the oil and gas sector, MFL pipe scanning often forms an important part of pipeline integrity assessment. Maximizing inspection efficiency without sacrificing probability of detection makes MFL a first-choice technology when testing long lengths of pipe and looking for small, isolated defects.
These unique technology benefits are now being recognized in other industries; for example, a successful field demonstration recently led to the implementation of MFL in the mining sector. Although a pipe found on a refinery will look the same outside as a pipe within a mining plant, the product inside is different. Cyanide is used regularly in mining to help with processing certain ores. Most commonly found in gold mining, cyanide will mix with slurry to form a particularly aggressive compound. Due to the toxicity of cyanide to humans, animals, and marine life, it is vitally important to prevent any loss of primary containment in this mining process pipework.
Although MFL seems like the obvious inspection technology choice for all long lengths of process pipe, until recently, MFL was restricted to 12-13mm (0.5in) wall thickness. This limitation was the result of inadequate magnetic strength, saturation, and signal processing which forced asset engineers to utilize other complimentary and often lower productivity NDT methods. Until now.
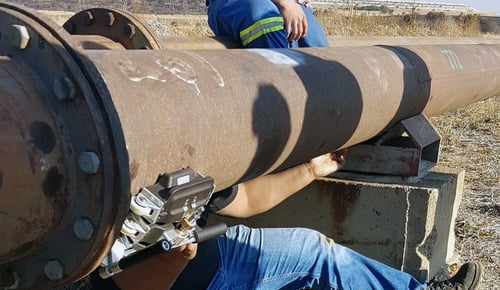
The Pipescan HD™ by Eddyfi Technologies was designed to maximize the field strength of the magnetic bridge and introduce sensor technology that improves the Signal-to-Noise Ratio (SNR) when inspecting thicker components. In order to implement the Pipescan HD in the mining sector, it had to be capable of inspecting piping networks that commonly had a wall thickness up to and including 16mm (0.6in). And while the Eddyfi MFL modelling software was able to demonstrate satisfactory magnetic saturation, there is no better way to demonstrate performance than by scanning a component of the expected configuration and wall thicknesses.
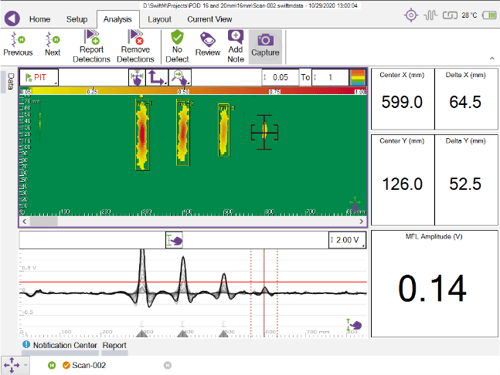
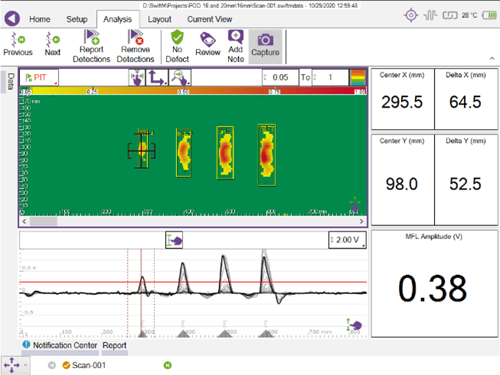
The following images show a standard calibration pipe with a 16mm (0.6in) wall thickness. The indications in the color-coded C-scan are simulated corrosion pits widely accepted by industry for MFL performance scans and calibration. The defects, machined with a 22mm (0.9in) ball end cutter, are at depths ranging from 20 to 80 percent wall thickness.

Top Side Corrosion

ID Connected Corrosion
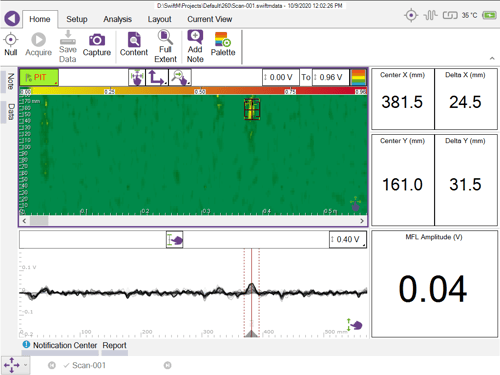
Following the successful demonstration of magnetic flux leakage for the full thickness range of the mining inspection scope, the Pipescan HD instrument with Swift-M data acquisition unit were accepted as the primary method of inspection for corrosion in slurry pipelines. The image below shows corrosion detected during an onsite inspection.

This technology evolution allows a step change in asset management of this type of component and product as unpredictable and isolated areas of corrosion are detected with accuracy, and most importantly, speed. Using the Pipescan HD, the full circumference of the pipe can be inspected with 100 percent coverage and unrivalled detection performance. Pipescan HD users can closely monitor the health of mining pipework with color-coded C-Scan displays that identify changes in the severity of corrosion levels, and if required, Eddyfi Technologies can suggest phased array corrosion mapping using M2M instruments with the LYNCS™ CM scanner to provide a quantitative assessment of the areas rapidly detected with MFL.

Qualify Before You Quantify
Eddyfi Technologies offers the full range of highest performance NDT inspection technologies to keep clients Beyond Current and mitigate future risk saving lives and protecting the environment, especially in susceptible environments like that of heavy industry and mining. Contact our team to discuss your specific inspection requirements and asset health monitoring programs today.


