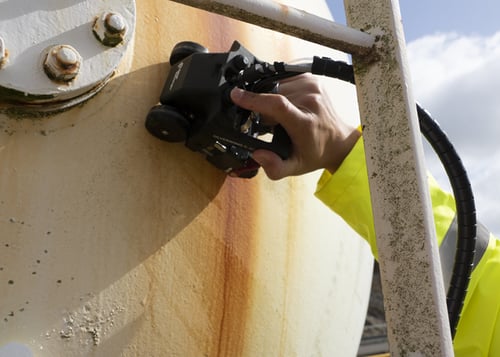
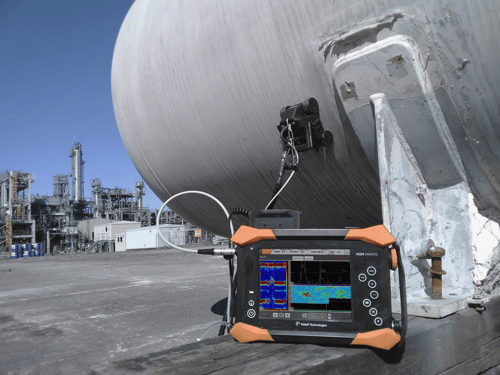
The R-Scan Array is a magnetic buggy designed to house a 64 element, 7.5 MHz phased array probe. The high frequency probe is connected to a waterbox that makes sure the probe face does not contact the inspection surface, and therefore, maximizes near surface resolution. The waterbox is connected to an irrigation system that allows a manually pumped supply of water to act as the coupling agent for the sound to enter the material. This portable immersion method is regarded as the most accurate form of Ultrasonic Testing (UT) as the only calibrated variable is material velocity.
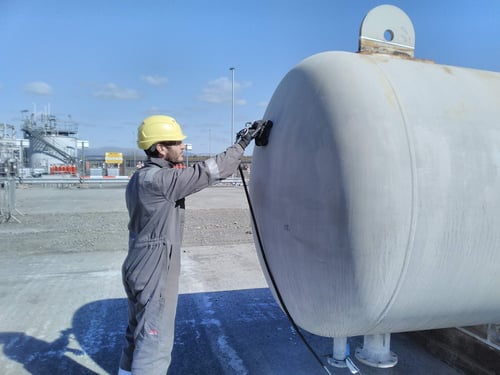
In addition to the high-performance phased array probe, the R-Scan Array has uniquely designed ergonomic features that allow customers to provide one-person operation and therefore reduce operational costs to their customers. Check out these gamechanger features.
Handle
R-Scan Array has an operating handle that provides an obvious hand placement position during operations. The data collection of a single axis phased array buggy involves a backwards and forwards motion as well as a sideways index. Other systems on the market do not have a handle and therefore two-dimensional movement is very difficult.

Integrated Electronics
This is the really clever part. Our experienced product management team has been involved in many years of Non-Intrusive Inspection (NII) campaigns. Using phased array systems to collect 100 percent coverage of large pressure vessels has always required an operator on the scanner and an operator on the phased array instrument. The integrated electronics within the R-Scan Array has instantly removed the need for a second person as full data capture can now be done with buttons built in the handle. The buttons allow for start/stop operations when moving forwards and backwards, but also data stitch functionality when moving sideways and indexing. A second function of the data stitch button allows the scan direction encoder to be rest to zero.
 Magnetic Break
One of the most time-consuming parts of an inspection is calibration and setup time. This can be problematic when using a magnetic wheeled buggy and portable immersion method. The immersion technique requires careful calibration of the phased array acquisition gates that are typically set to trigger two signals for time-of-flight measurements. The interface signal is typically set to zero position and a second gate is set to record the signal from the internal surface. This gate setup is a manual process, and stability of the inspection scanner is of significant importance. The R-Scan Array breaking mechanism allows operators to place the scanner on the surface at a given location and has the confidence to leave this in place while the calibration and gate setup is performed. Without a break, the scanner could easily run away and sometimes fall off the vessel!
Interchangeable Wheels
Every inspection is different, and it is often difficult to create an ideal setup for different scenarios. The magnetic force and friction of the wheels is a calculated decision to get the correct balance. If the magnetics are too strong, the system is difficult to operate; if they are too weak then the system may fall off, and all of this is dependent on the surface condition of the component. With this in consideration, the R-Scan Array is supplied with two sets of wheels as standard. The operator therefore has the option to pick the wheels that best suit the scenario. Having low friction wheels as an option is also important when connecting the R-Scan Array to the RMS; it makes a much smoother operation for automated crawlers and ensures stability of our robotic systems.

The Role of Software
All of the above mechanical features are supported further by the latest Capture™ software release. The 3.3 release has software options that really do maximize the performance for phased array corrosion mapping. Capture now has improved workflows for scan sequence setup, making it easier and faster for operators to determine scan positioning and data collection.
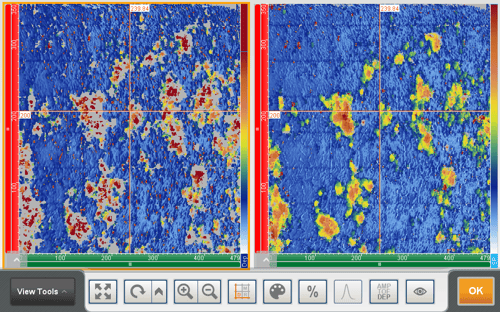
Capture 3.3 also has a unique floating gate option that maximizes the representation of corrosion mapping data sets by perfectly capturing signals that may reduce in strength due to corrosion shape. It is well known that corrosion does not always have a perfect reflective surface for ultrasound beams and therefore the strength of the signal can weaken at the most important area of the scan. The floating gate feature ensures these signal reductions do not affect data collection and therefore provides a perfect scan of heavily corroded areas.

Left side with floating gates disabled versus right side demonstrating the outcome of activating the floating gates
Finally, and possibly the most relevant feature in today’s technology requirements, Capture 3.2 has assisted defect recognition that can provide instant analysis of data sets and identify defects including their scan coordinates, area covered—and most importantly—corrosion depth and material thicknesses. Gone are the days where operators need to scroll through huge data sets and manually located corrosion. It is the software’s turn to help you. Don’t worry though; you are still in charge! If you don’t agree with the decision, you can override, change the settings, and run the analysis again.
Automatic Corrosion Sizing
Eddyfi Technologies R-Scan Array is a perfect example from our pick-a-mix of phased array corrosion mapping solutions designed to put in the work, so you don’t have to. Contact our team of friendly experts to discuss your next inspection campaign and stay Beyond Current!


