The Non-Destructive Testing (NDT) industry has seen a step change in the last couple of decades. For many years NDT was primarily recognized for quality assurance during manufacturing, and therefore equipment and training requirements were focused on evaluating critical components during fabrication. However, with facilities operating beyond their intended design life and a better understanding of the impact of in-service damage mechanisms, the NDT industry has shifted towards online inspection and integrity management.
Microbially induced corrosion is a worldwide in-service integrity problem, commonly found in carbon steel pipelines and dead legs. It often manifests as isolated corrosion pitting caused by biological growth. The main risk of MIC is its ability to penetrate a pipe or tube wall at an alarmingly fast rate, especially if equipment is left with stagnant, untreated water in it. MIC can take many forms, but It is often very isolated, narrow and is commonly referred to as the ‘needle in the haystack’.
Inspection and integrity engineers are often responsible for assessing the in-service risk of operating plants, and due to this significant responsibility, they will often require assurance that the recommended NDT technology can reliably detect the potential integrity threats. If MIC is identified as a potential threat, a reliable, suitably sensitive NDT method is needed for rapid detection.
Probability of Detection (PoD) studies and demonstrations of minimum detectability are industry accepted processes that help provide this assurance and deliver the expected level of confidence for engineers making critical decisions. Engineers typically want to know what defects and how large they must be to be detected as well as how accurate sizing is.
Eddyfi Technologies recently set out to document just how powerful the Pipescan HD Magnetic Flux Leakage or MFL inspection scanner is, with MIC as the target. We completed an in-house assessment to determine the PoD for MIC and other similar isolated corrosion type defects.
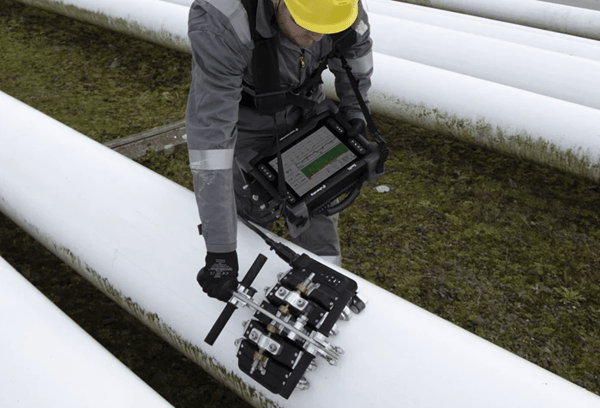
The first step was to create suitable test samples. A series of function test plates were manufactured, each containing several representative defects of various diameters and depths. These were manufactured at the optimal thickness range for Pipescan HD and MFL.
Below is a diagram detailing an example sample plate that was manufactured at 6mm, 8mm, 10mm and 12mm wall thicknesses:
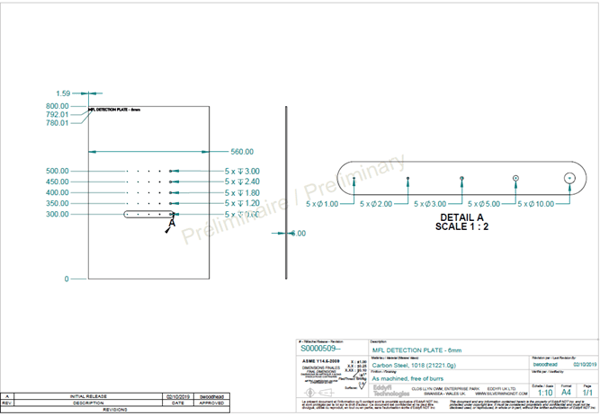
Each plate contained 20 machined defects:
-
1mm diameter @ 10%, 20%, 30%, 40% and 50% wall loss
-
2mm diameter @ 10%, 20%, 30%, 40% and 50% wall loss
-
3mm diameter @ 10%, 20%, 30%, 40% and 50% wall loss
-
5mm diameter @ 10%, 20%, 30%, 40% and 50% wall loss
-
10mm diameter @ 10%, 20%, 30%, 40% and 50% wall loss
The Pipescan HD 127XFLAT model was used to inspect each plate in turn, with the defect situated initially top side to represent external corrosion pitting, then on the bottom side to represent internal corrosion pitting.
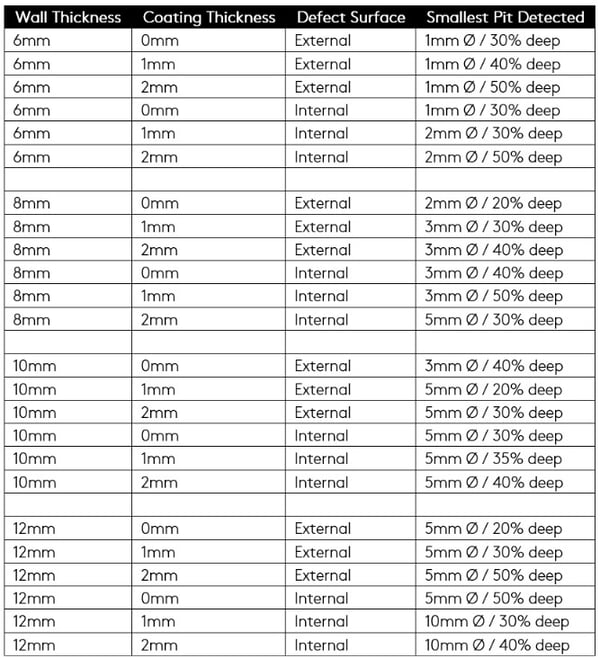
The below table represents the inspection capability of the Pipescan HD system in terms of detecting small-diameter pitting type defects. This information clearly identifies the minimum detectability in relation to nominal wall thickness and coating thickness. It should also be noted that all defects larger than those listed in the minimum detection column were detected above the required threshold level.
-
Defect type = flat-bottomed vertical wall machined defect
-
Detection definition = indication visible on screen (possibility of background noise also present)
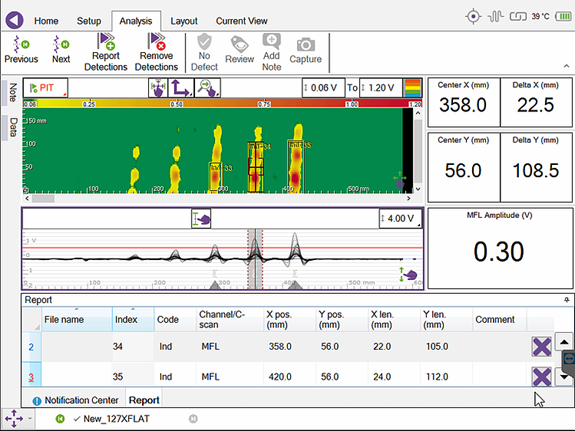
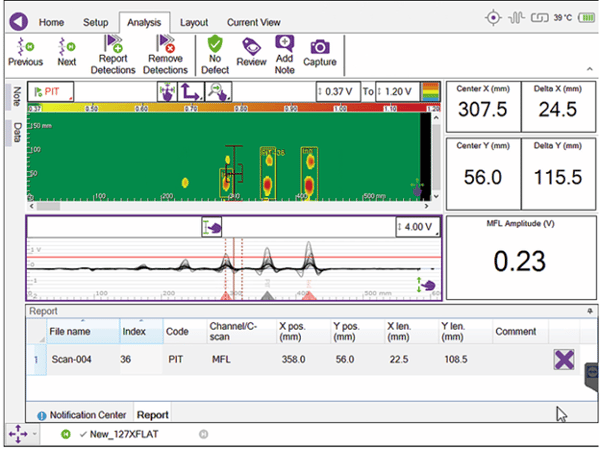
MFL is a mature technology with a proven track record for rapidly and reliably detecting corrosion, isolated pitting, and other in-service damage that creates a localized reduction in material wall thickness. Earlier MFL systems were relatively low resolution and worked on LED alarm electronics. They may have had the ability for detection but didn’t provide a permanent record nor the sensor resolution to differentiate adjacent defects or the detection power to resolve small volume defects. The Pipescan HD by Eddyfi Technologies has evolved the magnetic flux leakage output and has clearly demonstrated with this study best-in-class performance for minimum detectability, probability of detection, and resolution. See how the technology expands the scope of performance in this article highlighting MFL in the mining industry.
Increasing confidence of inspections, with high efficiency, the Pipescan HD is the fast, simple and effective solution for pipeline corrosion mapping. Contact one of our experts to learn more and stay Beyond Current!
Authors: Stuart Kenney, Matthew Kircough


